1. Deploying a pfSense VM on VirtualBox to use as a Router/Firewall
This page is part of a broader series on creating a cybersecurity lab with VirtualBox.
Click here to return to the main project description page.
2.7.2In this module, we’ll set up a pfSense firewall virtual machine in VirtualBox to segment and secure the networks within our home lab.
Downloading pfSense
pfSense serves as the NAT router and firewall for the lab environment, so it must be the first virtual machine to start. Once pfSense is up and running, you can launch the rest of your VMs.
Whether you're building a lab in the cloud (GCP, AWS, Azure, ...) or on-premises, it's essential to design your network upfront. Be sure to account for future scalability, as redesigning the network later is far more challenging than planning it properly from the start. Refer to the diagram in the main project description.
At the time of writing (July 2025), Netgate requires users to create an account and provide personal information to download pfSense CE ISO images. While this policy is likely intended to prevent misuse of pfSense, we will avoid sharing personal information in order to preserve user privacy.
Head to Netgate PfSense's download page
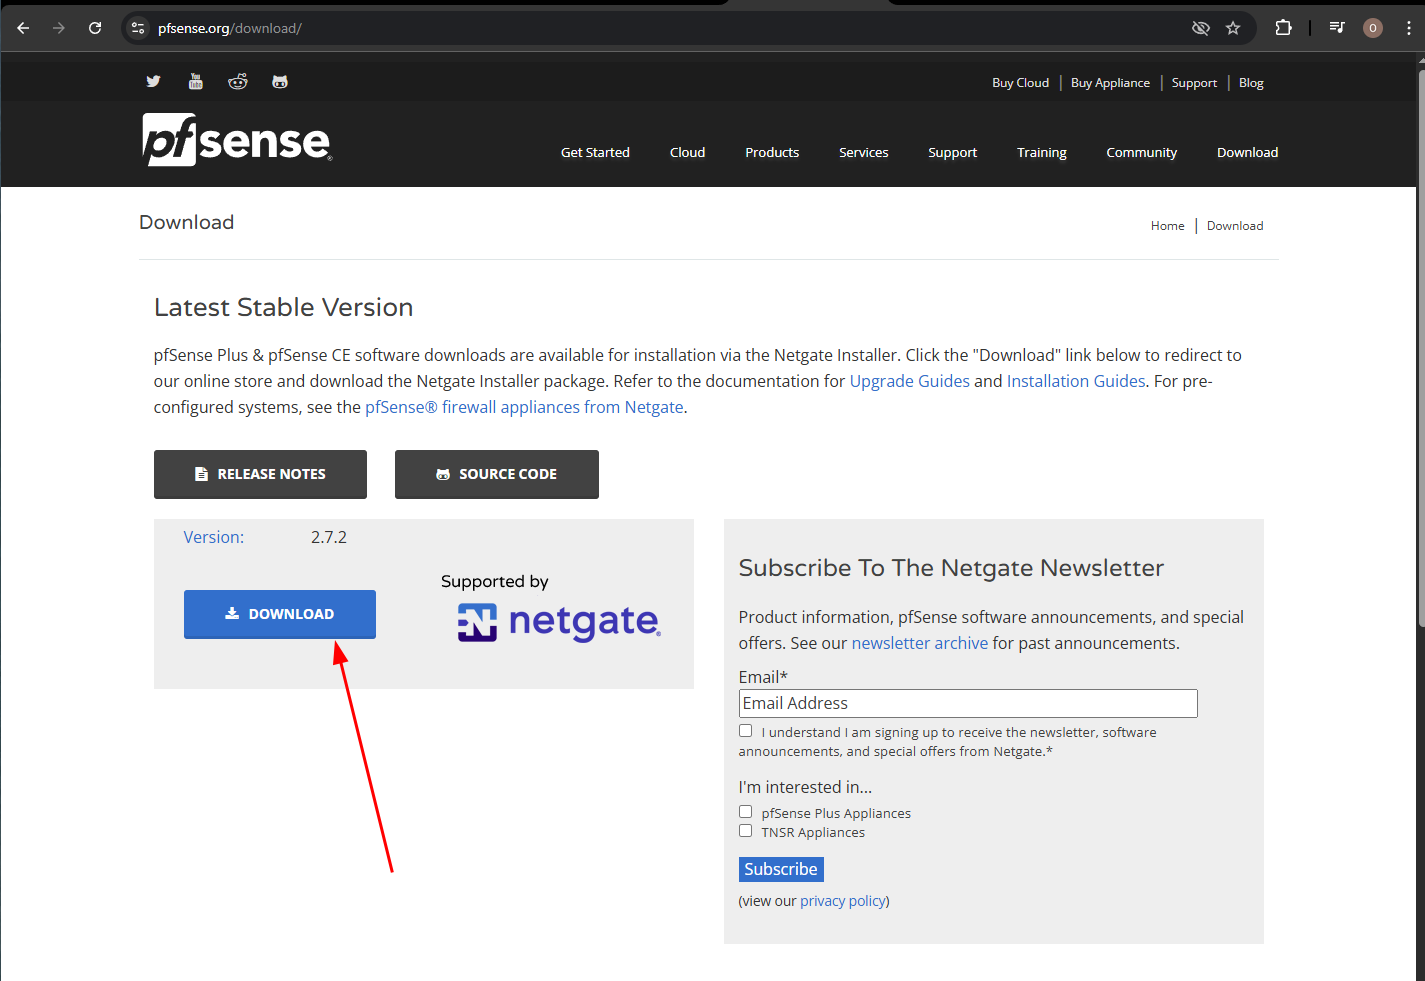
Click on "Download"
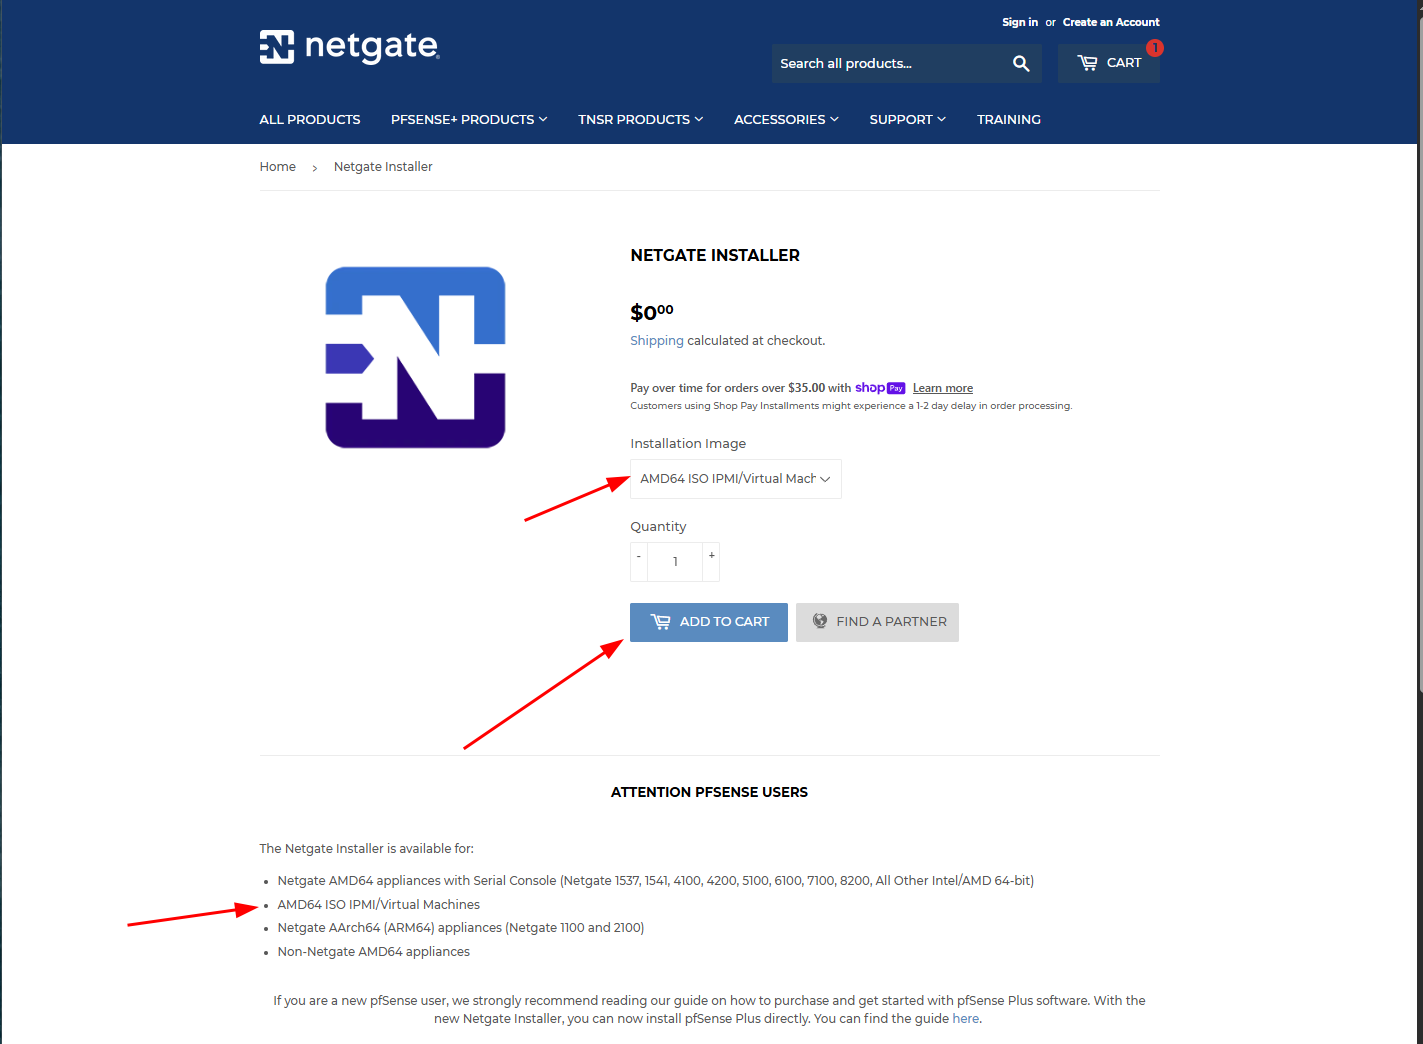
Select "AMD64" for the CPU architecture and click "ADD TO CART"
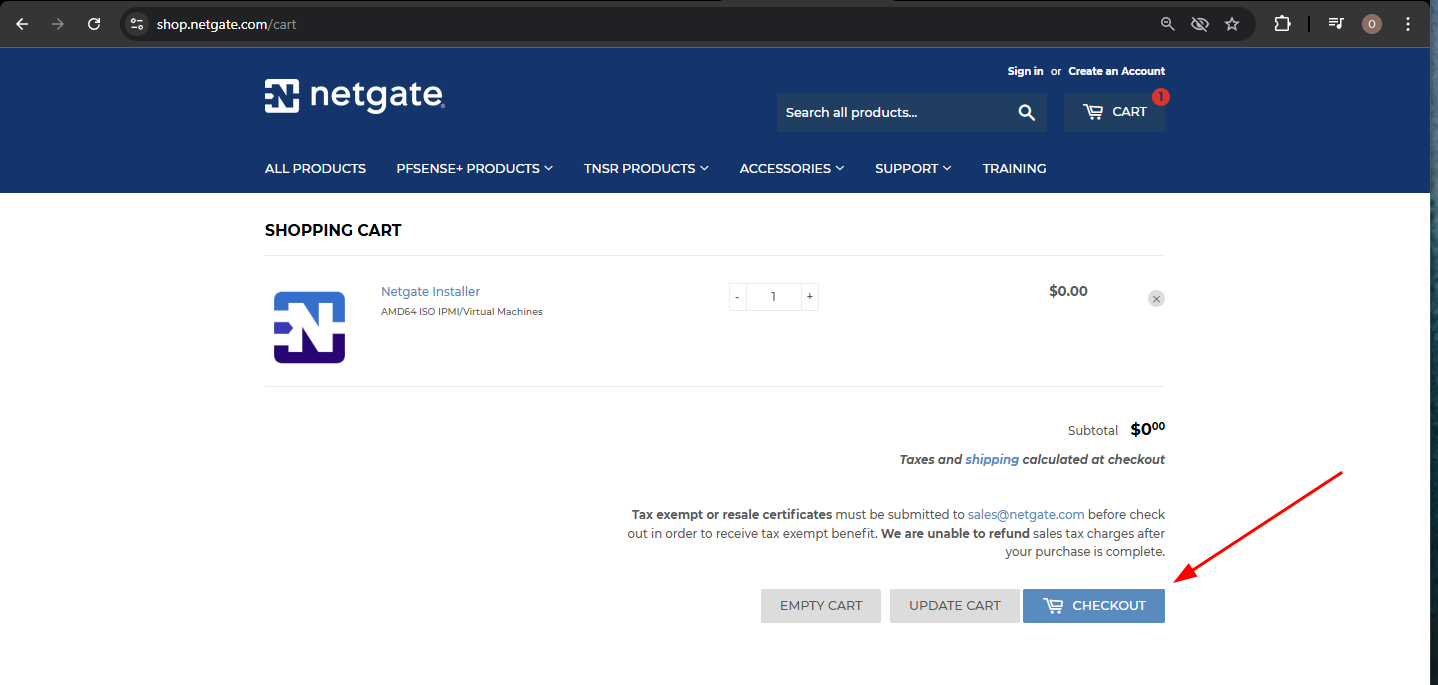
Proceed to checkout
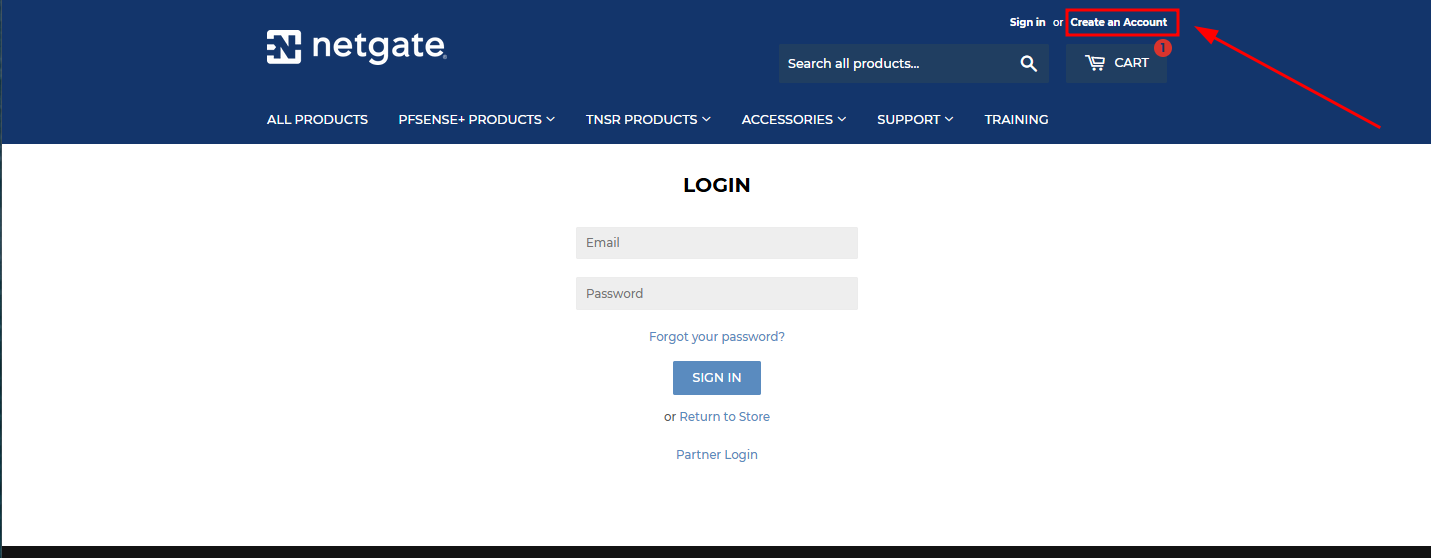
For the registration, you can use some free temporary mail services like Temp Mail
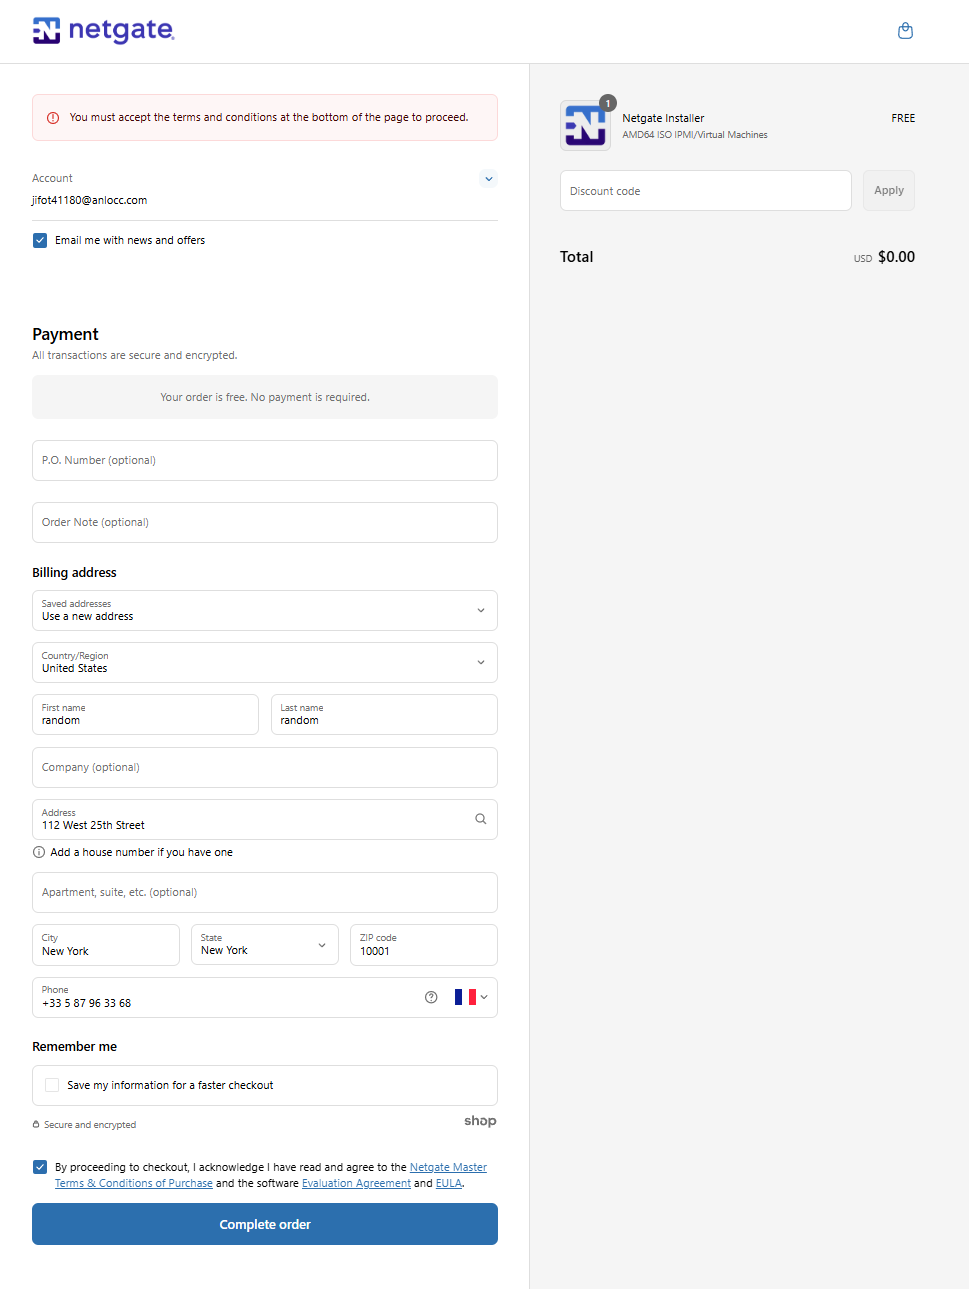
Fill in the registration form and click "Complete order"
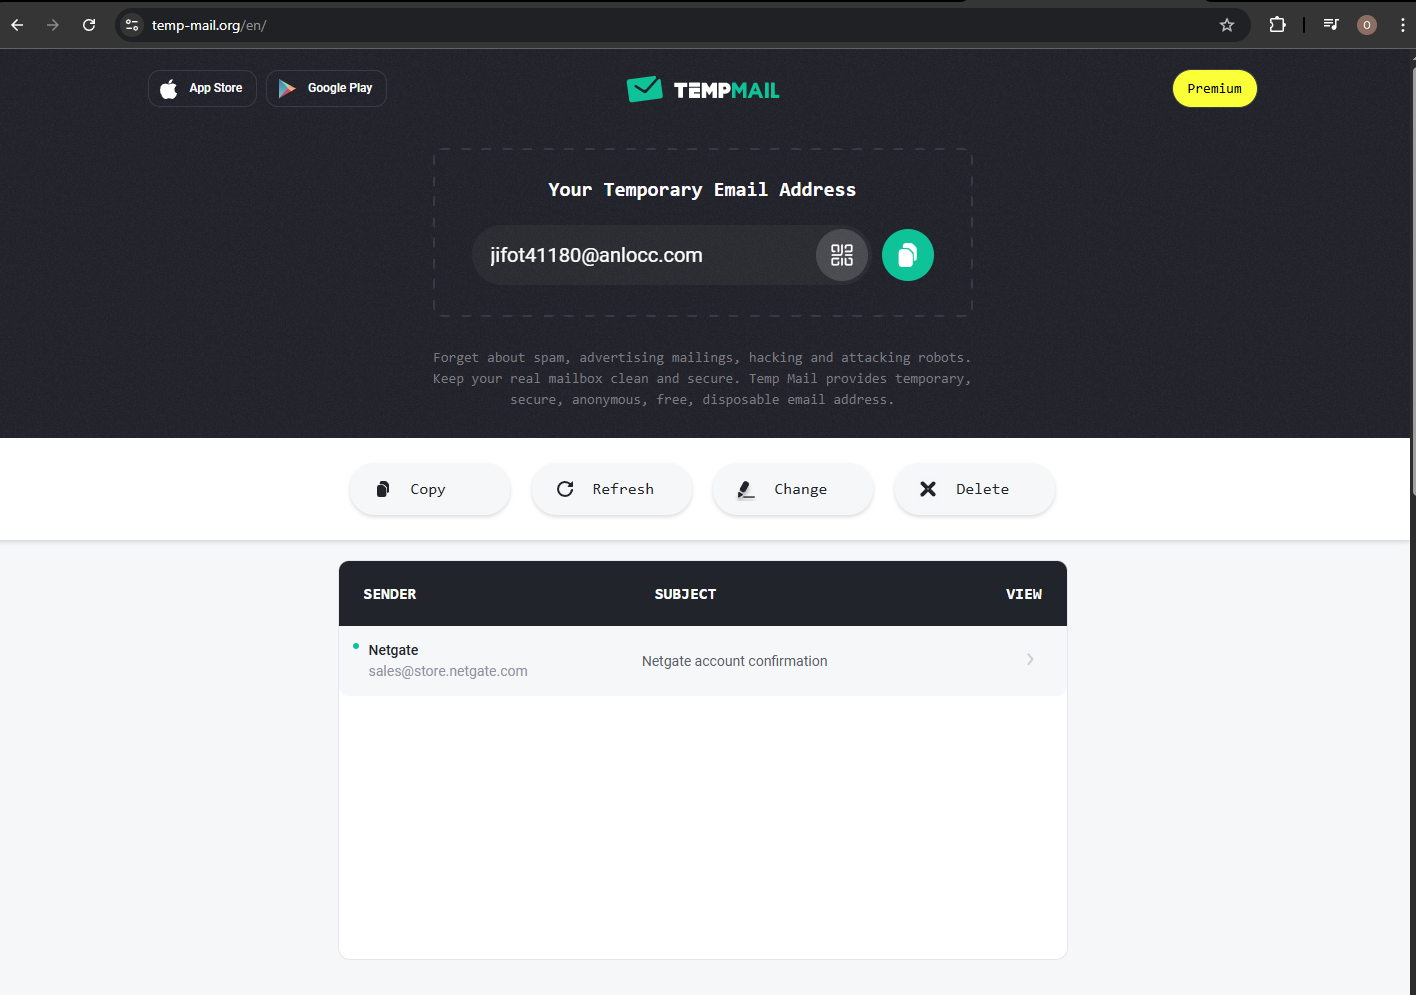
Access the mail you received to confirm your new account creation
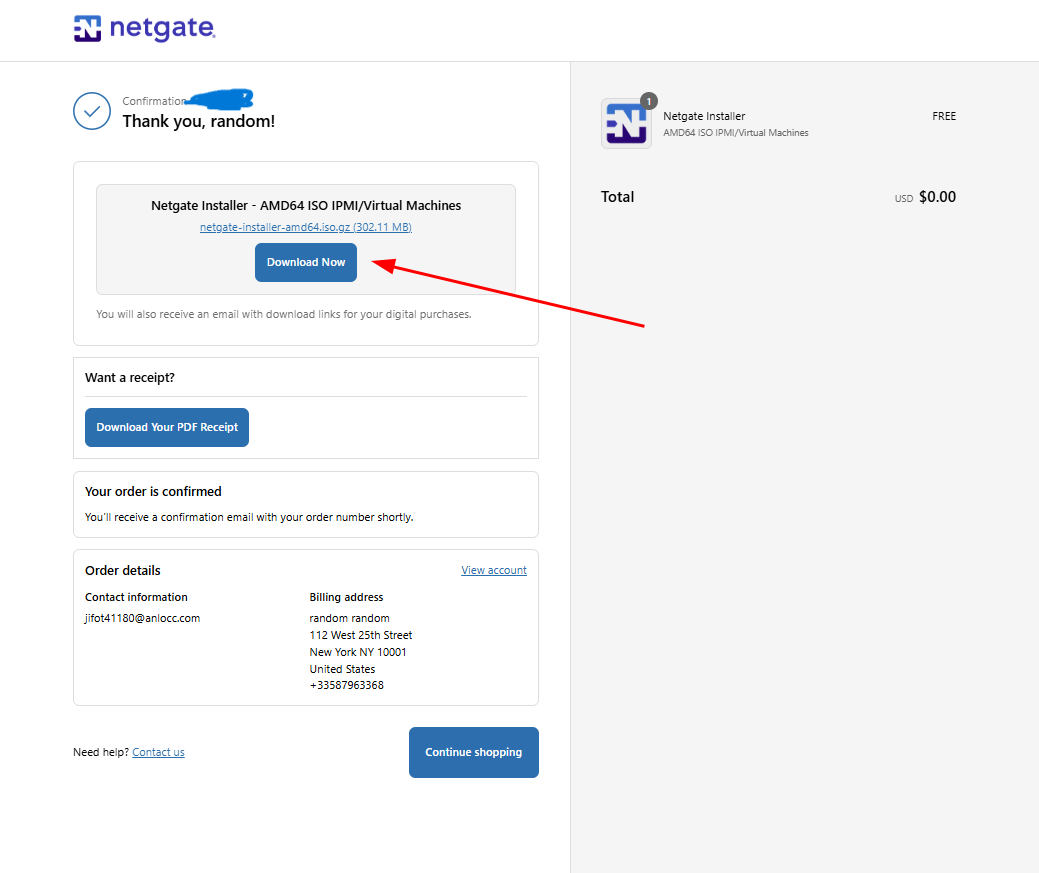
Finally, click the "Download Now" button to download the ISO file

Once the ISO Image downloaded, you can you use a tool like Winrar to extract it.
Adding a new Virtual Machine in VirtualBox
Once the .iso image file downloaded, We will proceed to creating the virtual machine that the image will be installed on.
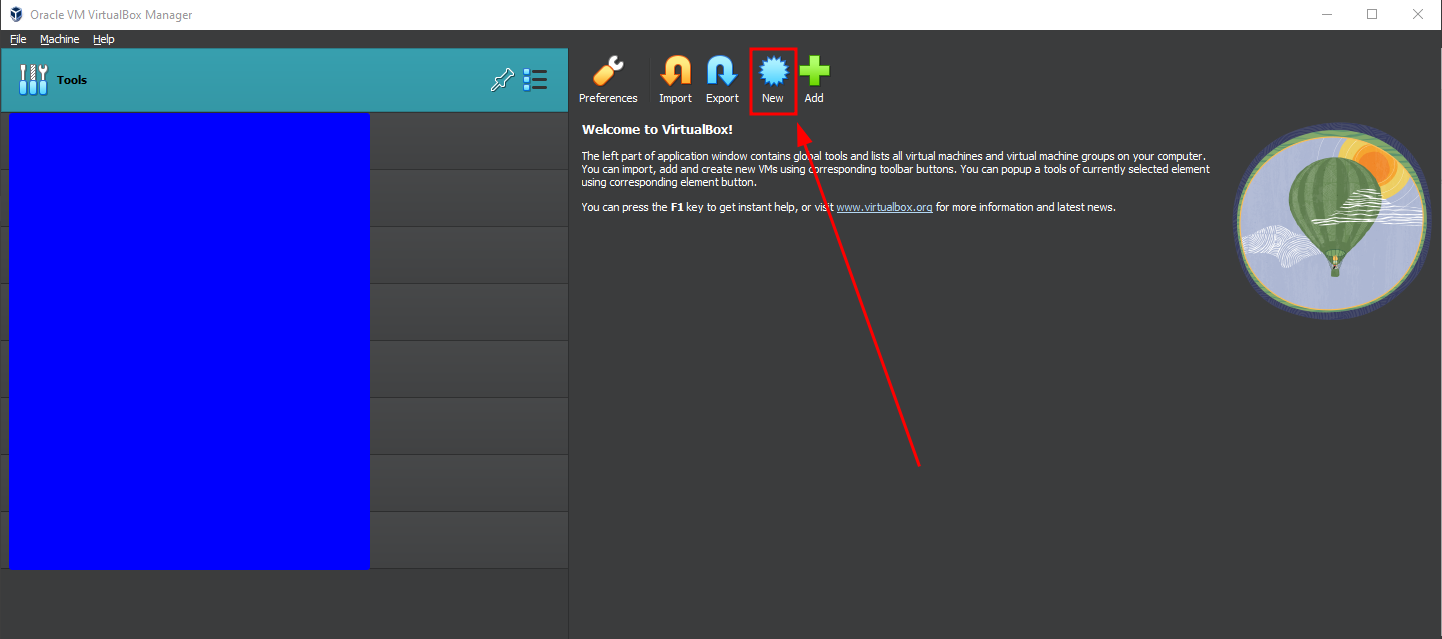
On VirtualBox, click on "New" to add a new virtual machine
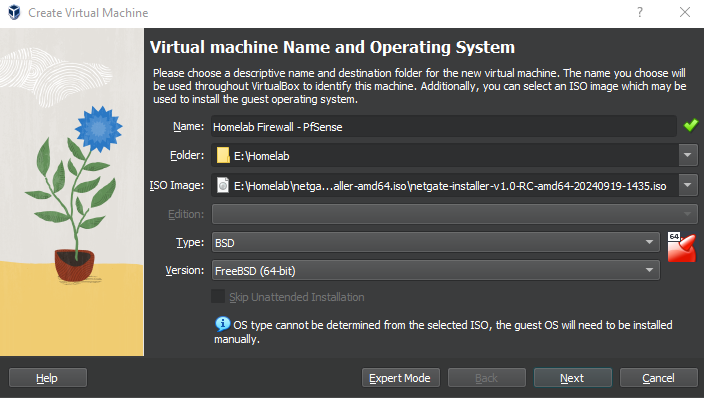
Select a folder of your choosing to store your homelab's VMs files and make sure you select the downloaded PfSense ISO file in "ISO Image".
Depending on your infrastructure, pfSense doesn't require extensive resources, but it's always a good idea to allocate a reasonable amount to ensure smooth performance.
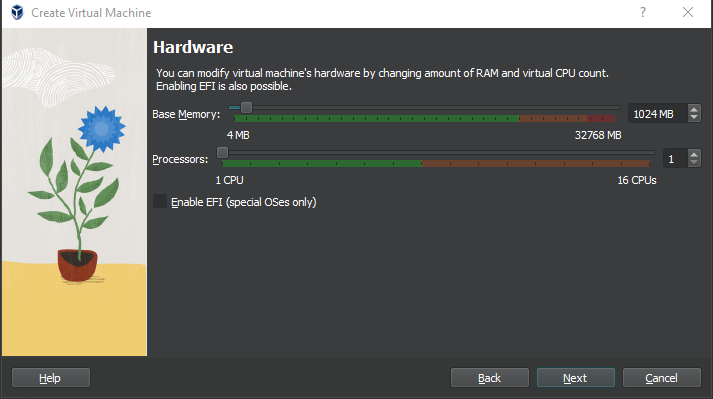
Adjust the memory and processor settings according to your system capacity
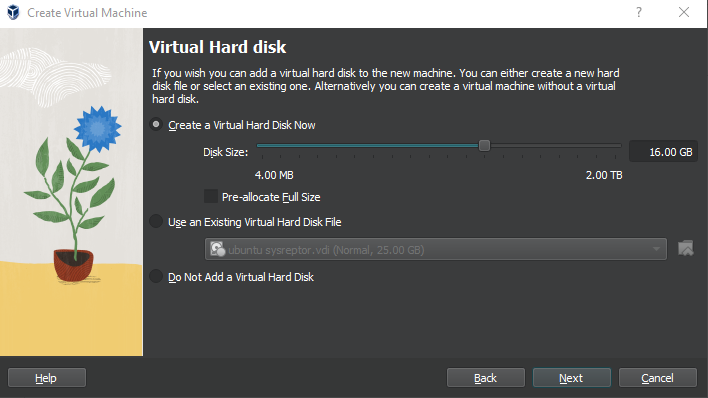
Leave the default 16GB, it is enough for PfSense
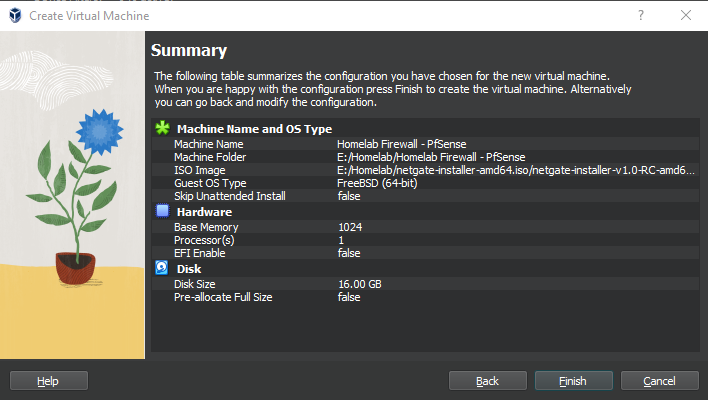
Click Finish
Our VM is now created. Before booting it and installing pfSense, we have to tweak some settings and disable what's not needed to ensure we don't get issues later.
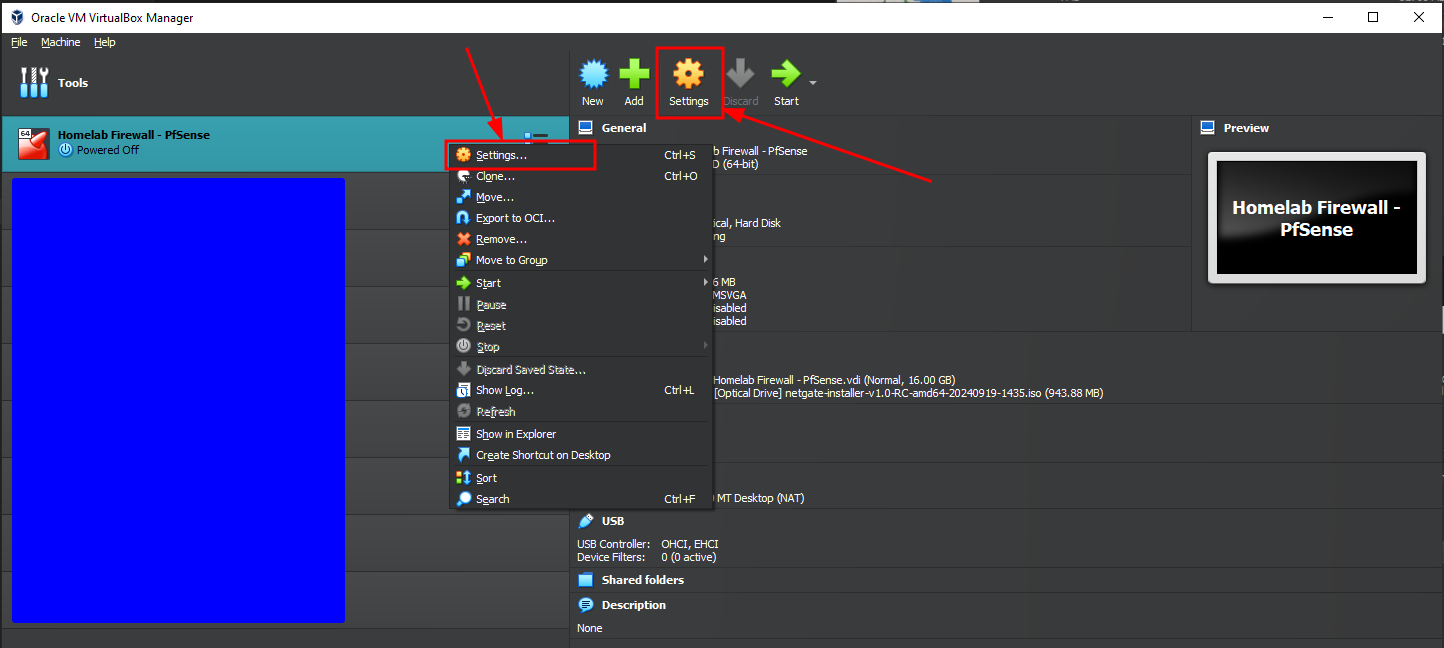
Right click on the new VM, choose "Setting..."

In the "System" tab, move "Hard Disk" above "Optical" and disable "Floppy" in the boot order

Disable the audio controller under the "Audio" tab, since it's not needed for pfSense
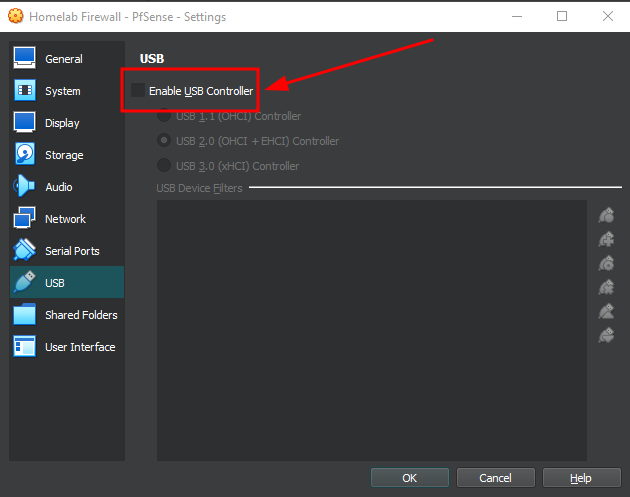
Under "USB", uncheck "Enable USB Controller" to disable unnecessary hardware
Setting up Network Interfaces on the VM
One of the most important steps ! Configuring the network interfaces.
On the "Network" menu, we add the following interfaces :
Adapter 1 : WAN interface for Internet connectivity, we chose "Bridged Adapter" instead of NAT
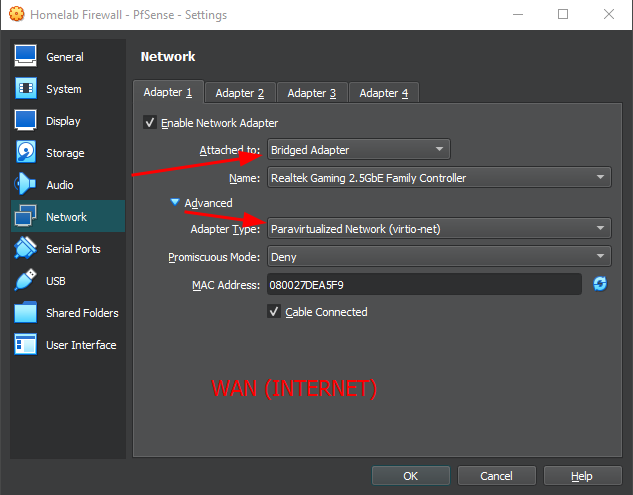
Under "Network", select "Paravirtualized Network (virtio-net)" as the adapter type. For Adapter 1, it will be our WAN, so we will attach it to "Bridged Adapter"
Adapter 2 : LAN interface for the networking/firewall management, SOC, VOC & attack simulations
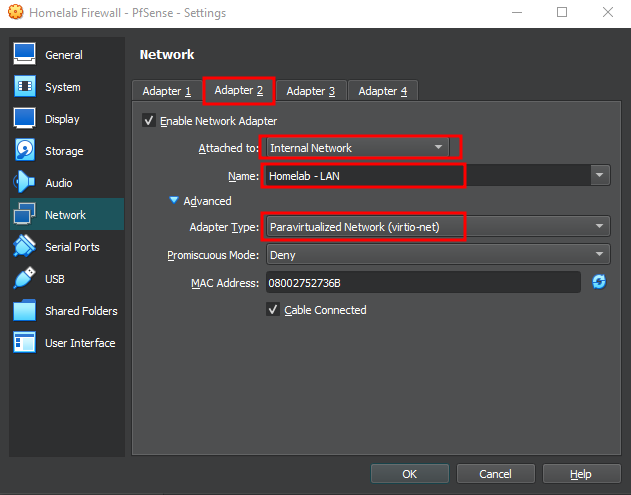
Select "Paravirtualized Network (virtio-net)" as the adapter type. Set Adapter 2 to "Internal Network" for LAN configuration. We named it "Homelab - LAN", which will be used for network management and attacker simulation
What is a virtio-net Adapter type ?
For this lab, we will be using a paravirtualized network adapters (virtio-net) in VirtualBox (also available in other hypervisors).
- Virtio is a virtualization standard for network and disk device drivers.
- It's designed to provide high-performance I/O between guest and host by reducing overhead.
Advantages of Virtio-Net (Paravirtualized)
- Performance
- Virtio drivers are lighter and closer to the hypervisor’s abstraction, so data flows with much less CPU usage.
- Higher throughput and lower latency compared to emulated NICs.
- Lower Overhead
- Emulated NICs (like Intel PRO/1000) try to mimic real hardware, which adds unnecessary CPU cycles.
- Virtio bypasses this by exposing a virtual interface optimized for virtualization.
- Better Packet Handling
- More efficient in terms of packet I/O, useful when simulating large volumes of network traffic (e.g., Snort, Zeek, packet captures).
- Realism in Labs
- If you're testing logging, detection, or IDS systems, virtio gives you closer-to-realistic traffic flow without dropping packets due to CPU limitations.
- Lower Disk & Memory Impact
- Less stress on system resources compared to traditional emulated devices.
If you decide to add a custom VM not included in this writeup, keep in mind that there are guest OSs that don't support virtio drivers out of the box (e.g., older versions of Windows), you might have connectivity issues. In that case, you’d need to install the virtio drivers manually during OS setup.
In our lab, since we are simulating attack/detection chains with tools like Wazuh or Suricata, virtio-net is perfect. It makes sure our lab isn’t bottlenecked by networking performance, especially when sending logs or simulating attacks across multiple machines.
Adapter 3 : DMZ interface for simulating real-world attack surfaces and testing CVEs
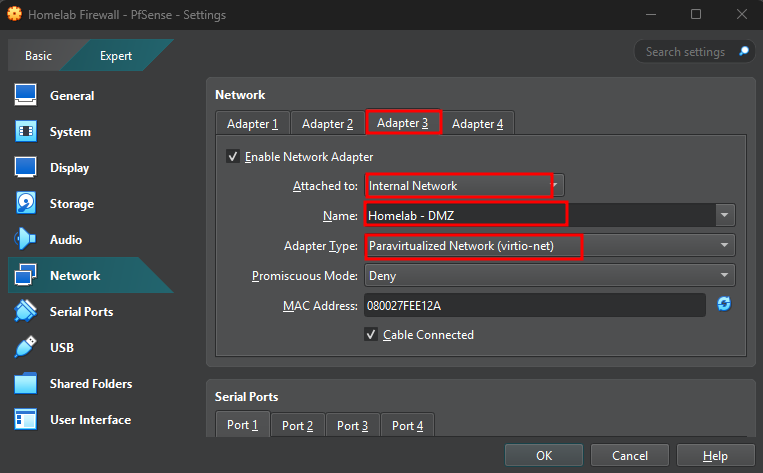
Select "Paravirtualized Network (virtio-net)" as the adapter type. Set Adapter 3 to "Internal Network" for the DMZ LAN. We named it "Homelab - DMZ", to be used as our DMZ
What is a DMZ ?
A DMZ (Demilitarized Zone) is a segmented subnetwork that contains and exposes an organization's external-facing services to an untrusted network, usually the internet.
Purpose of a DMZ
-
To add an extra layer of security between the public internet and your internal (private) network.
-
It isolates services like:
- Web servers
- Mail servers
- DNS servers
- Reverse proxies
- VPN concentrators
Why use a DMZ?
If an external-facing server is compromised, the attacker only gains access to the DMZ, not the internal LAN. Internal systems stay protected.
In our homelab, the DMZ simulates the real-world exposure of internet-facing services. It will allow us to:
- Test how attackers exploit exposed services.
- Detect intrusions from the SOC (SIEM) zone.
- Defend with firewall rules, hardening, monitoring, etc.
Adapter 4 : AD (Active Directory) interface for simulating an internal network
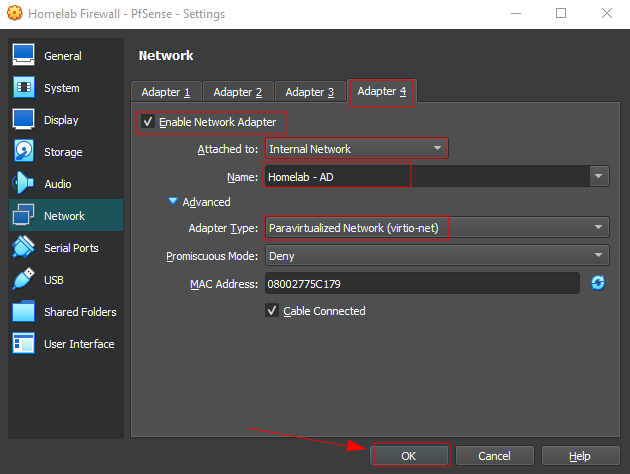
Select "Paravirtualized Network (virtio-net)" as the adapter type. Set Adapter 4 to "Internal Network" for the Active Directory
What is Active Directory ?
Active Directory (AD) is a directory service developed by Microsoft that is used to manage and organize users, computers, and other resources in a Windows domain network.
In Simple Terms:
Active Directory is like a centralized database that tells:
- Who you are (users, computers, groups),
- What you can do (permissions, roles),
- Where you belong (organizational units, domains).
Key Components
| Component | Description |
|---|---|
| Domain | A logical group of network objects (users, computers, etc.) under one admin policy. Example: corp.local |
| Domain Controller (DC) | A server that runs AD services and handles authentication/authorization. |
| User/Computer Objects | Represent individual users and machines in the network. |
| Organizational Units (OUs) | Containers to logically organize users and apply group policies. |
| Group Policy Objects (GPOs) | Settings applied to users/computers for security and management (e.g., password rules, software restrictions). |
| Kerberos Authentication | The main authentication protocol in AD—tickets instead of passwords. |
| LDAP | Protocol used to query and interact with AD directory structure. |
What Is It Used For?
- Centralized user management: One account to access email, file shares, applications.
- Access control: Permissions based on user group, role, or computer.
- Authentication: Verifies identity (logins, Kerberos tickets).
- Policy enforcement: Push security and configuration rules via GPOs.
Active Directory in Pentesting / Homelab
If you’re doing internal pentests, AD is the main target:
- Privilege escalation: From a regular user to Domain Admin.
- Lateral movement: Pivoting across machines using stolen hashes/tokens.
- Persistence: Adding users/groups, GPO backdoors, etc.
In our homelab, we will be using GOAD, which is a preconfigured vulnerable AD environment, ideal for learning:
- Initial access
- Recon (BloodHound, LDAP)
- Exploits (kerberoasting, ACL abuse, etc.)
Starting the VM & Installing PfSense
Once all the VM configurations are set, we can start the VM to proceed with the installation of the ISO file. Simply follow the steps shown in the screenshots below. (Feel free to look up each setting at your own pace, as explaining them is beyond the scope of this tutorial.)

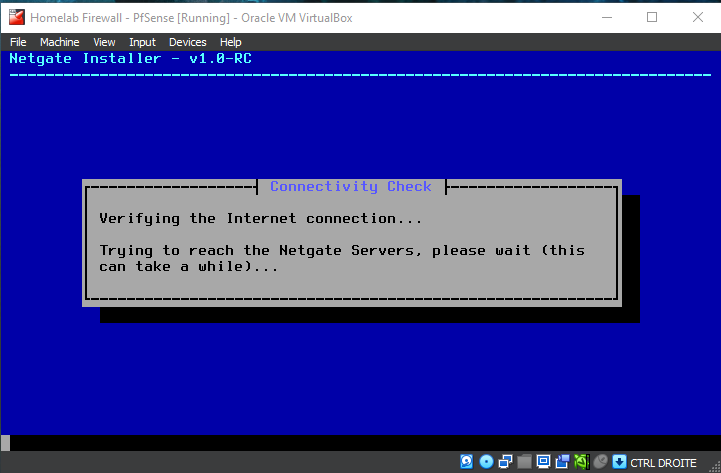
Start the pfSense VM and wait while the installer loads
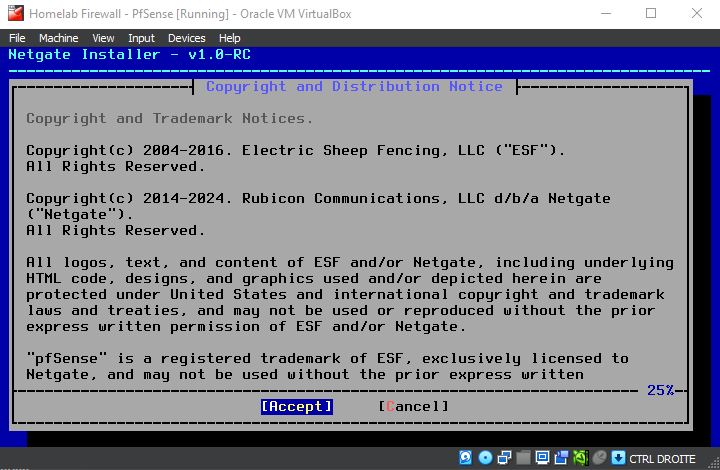
Select "Accept"
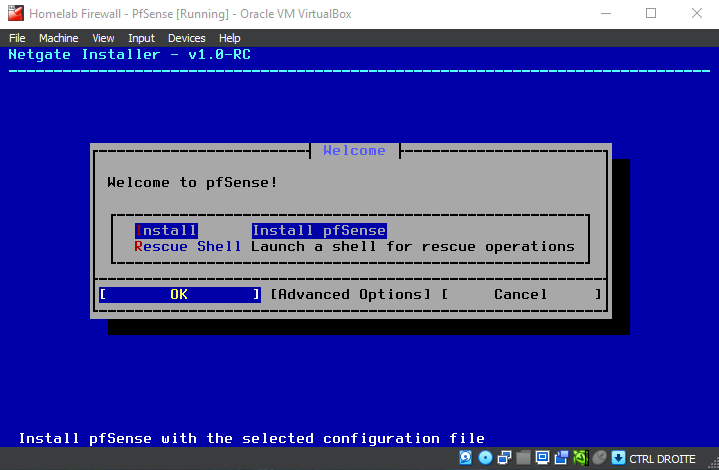
Select "OK" for "Install"
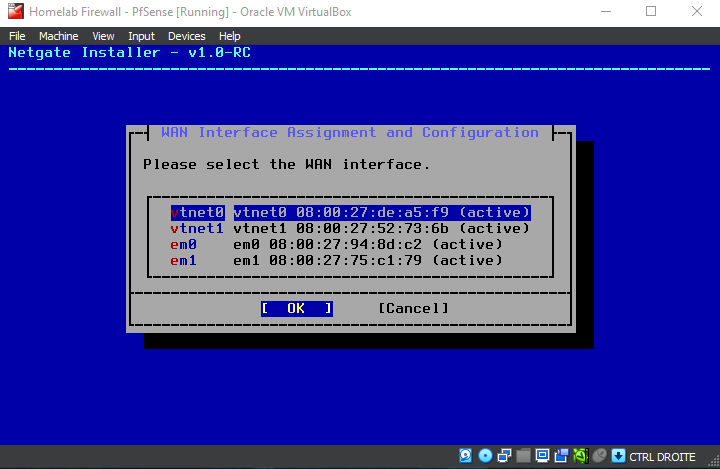
Since Adapter 1 on the VMs settings was configured as WAN, that's the one we select
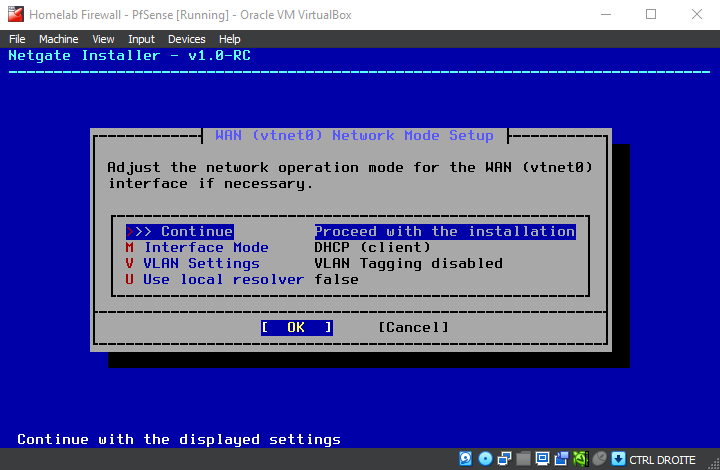
Simply "Continue" for now
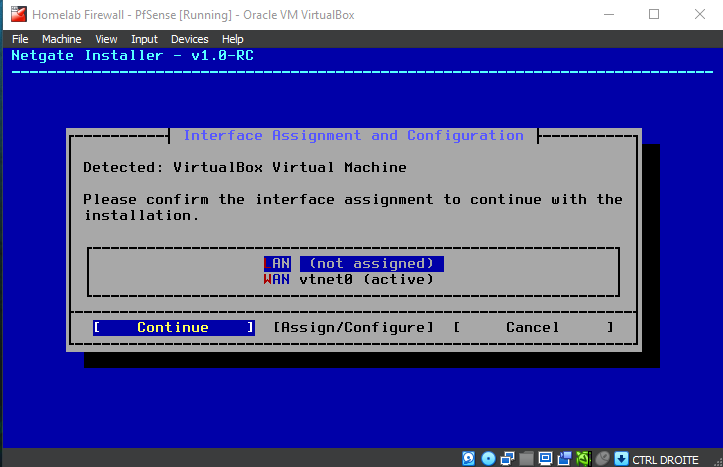
Simply "Continue" for now
We will be using the Community Edition of PfSense
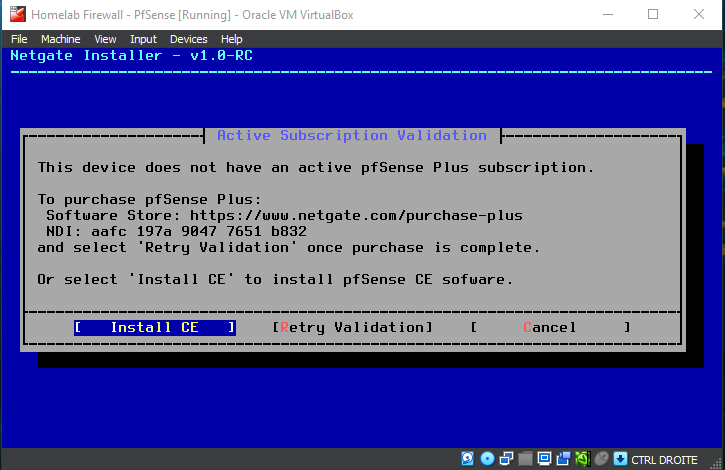
We will use the Community Edition for this Lab
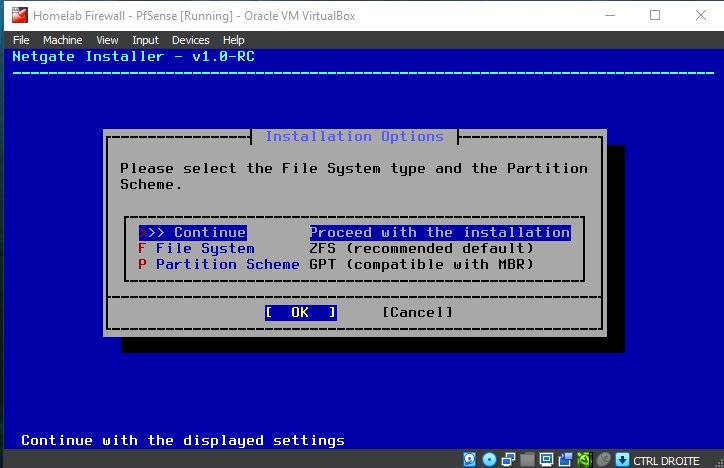
Simply "Continue" for now
Nothing to change here, simply select "OK"
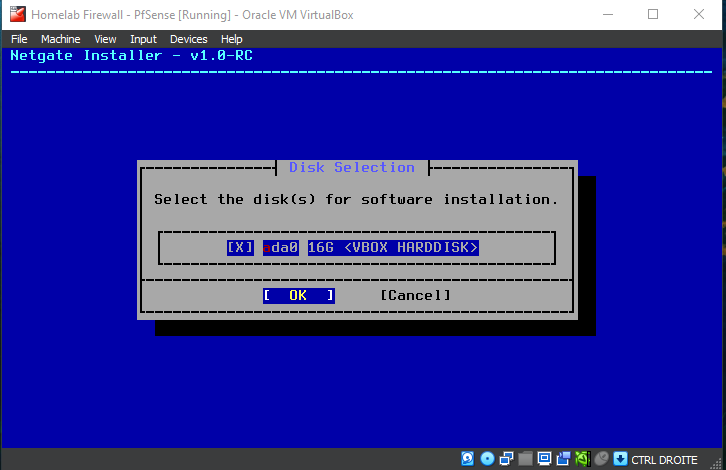
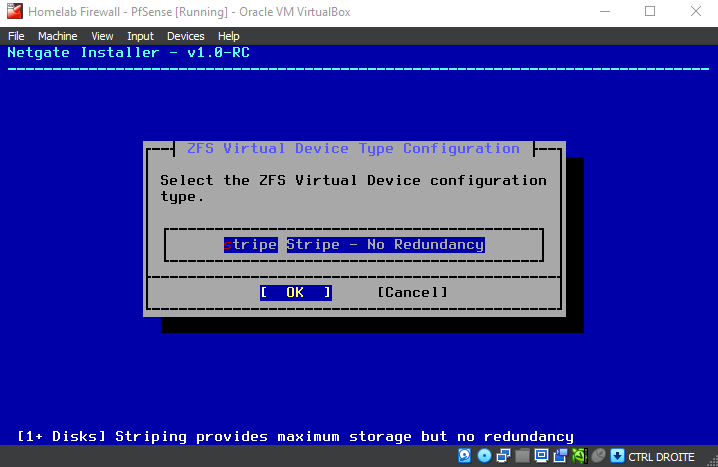
OK
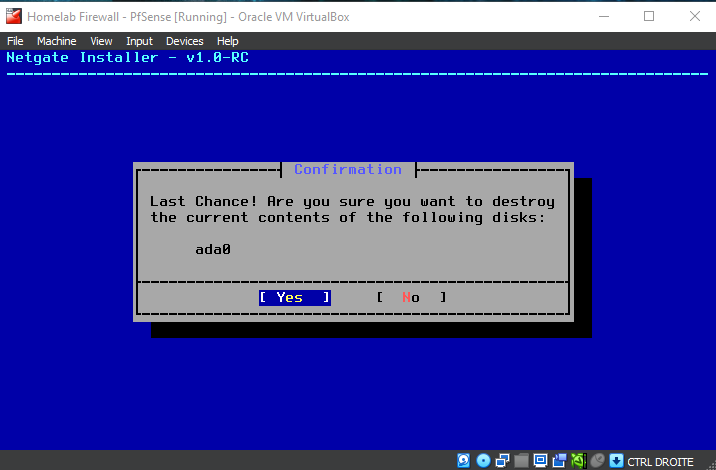
Say "Yes" to confirm
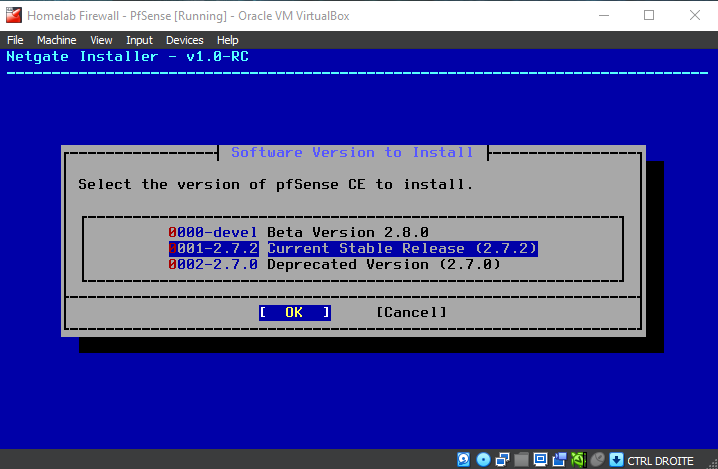
At the time of writing, we chose the current stable release 2.7.2
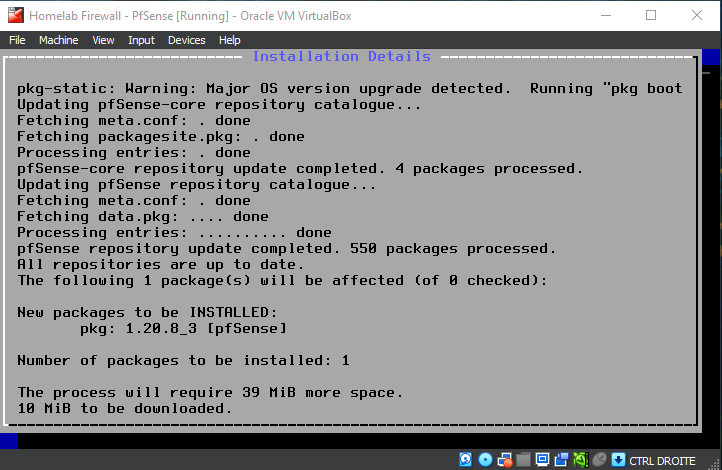
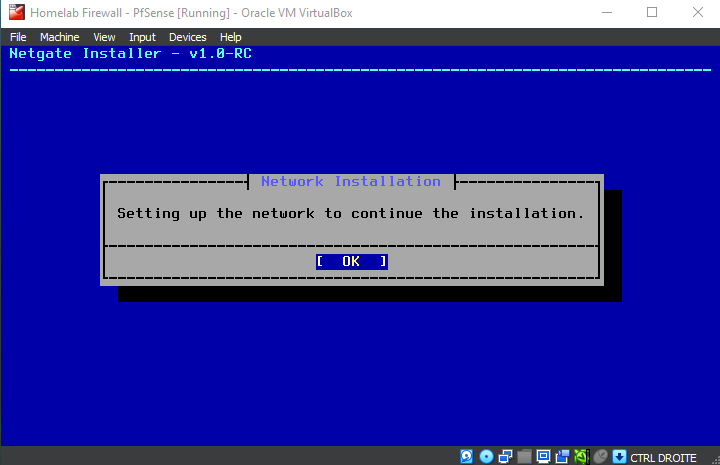
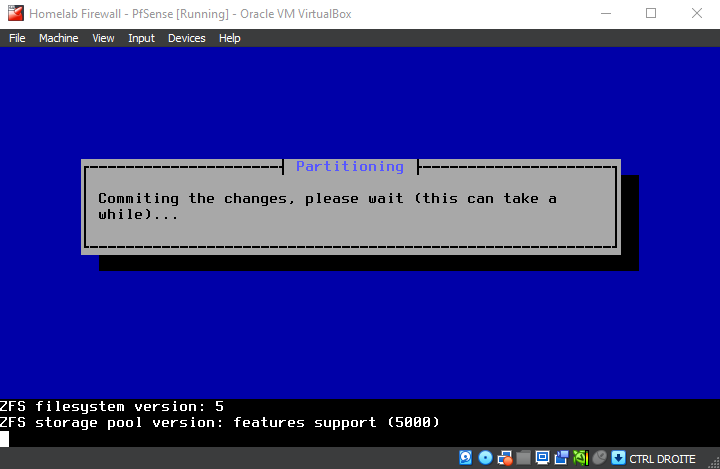
Please wait while the installer downloads the core files and completes the installation process.
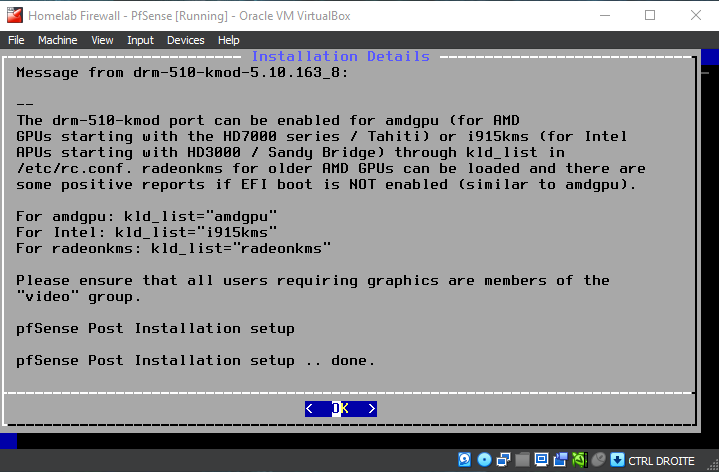
OK
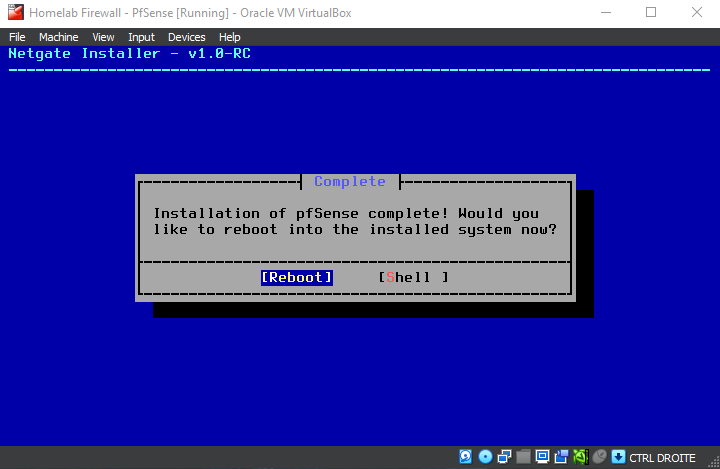
Installation is complete, choose "Reboot"
Configuring pfSense's network interfaces
Wait for the VM to finish booting. When prompted with Should VLANs be set up now [y|n]?, select n (no).
Respecting the interfaces on the VM's adapters we set earlier, simply input them in order :
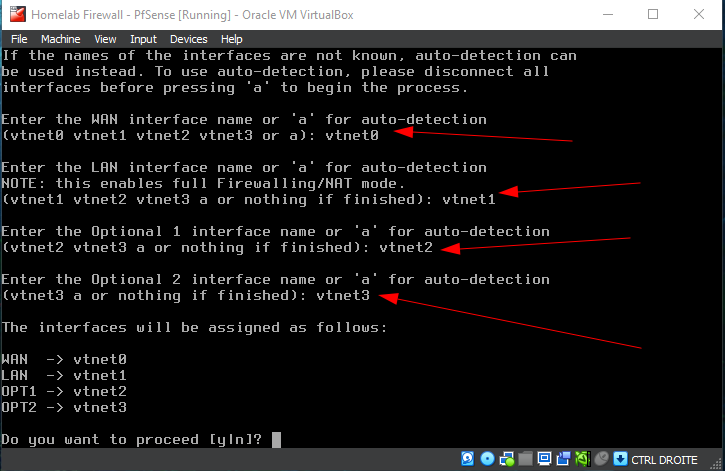
Initial interface configuration screen of pfSense. Manually assigns network interfaces as follows:
- The WAN interface pulled an IP address from the home network.
- The Default LAN IP address space is 192.168.1.1/24 (will be changed in the next steps)
- OPT1 (optional interface 1) – DMZ – is not yet configured.
- OPT2 (optional interface 2) – AD – is not yet configured.
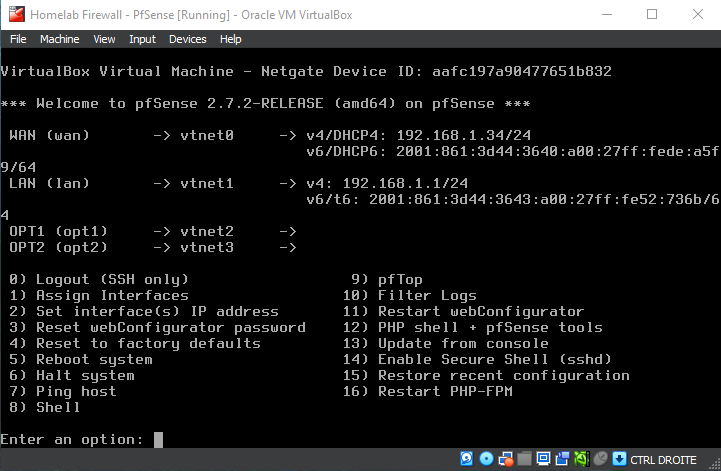
Here is the first boot network configuration would look like (IPv6 is not needed for this lab, it's okay if you don't have it on your WAN)
Configure the LAN interface
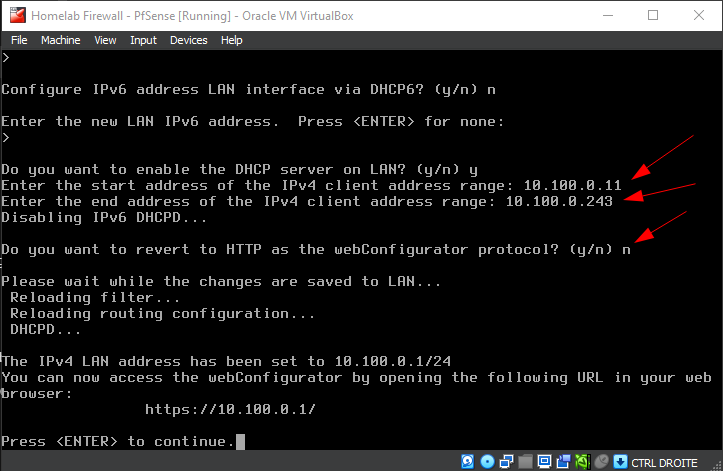
Here, we configure the LAN interface by assigning static IP address and enabling the DHCP server:
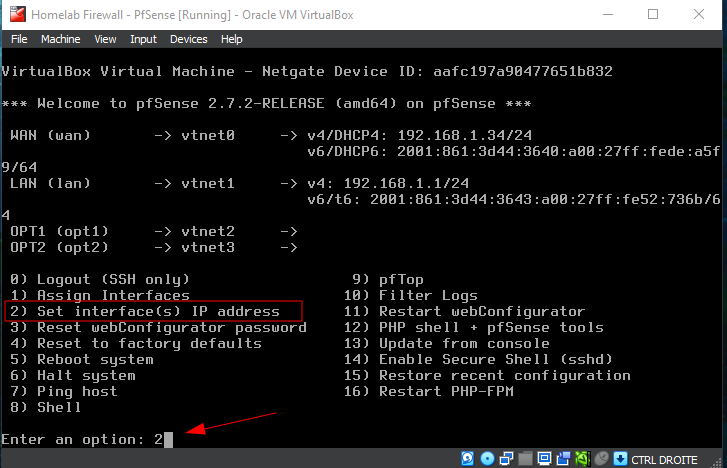
On the pfSense console menu, select option 2 to Set interface(s) IP address.
- Choose the interface number corresponding to the LAN (in this case,
2). - When prompted, decline DHCP for the LAN interface by typing
n. - Enter the desired static IP address (
10.100.0.1) and subnet mask bit count (24for a/24subnet). - Leave the upstream gateway blank by pressing
ENTER. - Disable IPv6 configuration by typing
n. - Enable the DHCP server on LAN by typing
y, then specify the DHCP range (start:10.100.0.11, end:10.100.0.100). - Enable the DHCP server on LAN by typing
y, then specify the DHCP range (start:10.100.0.11, end:10.100.0.100). - Answer
nto reverting to HTTP as the webConfiguraor protocol.

Follow the instructions on the screenshot and/or the description above
Follow the instructions on the screenshot and/or the description above
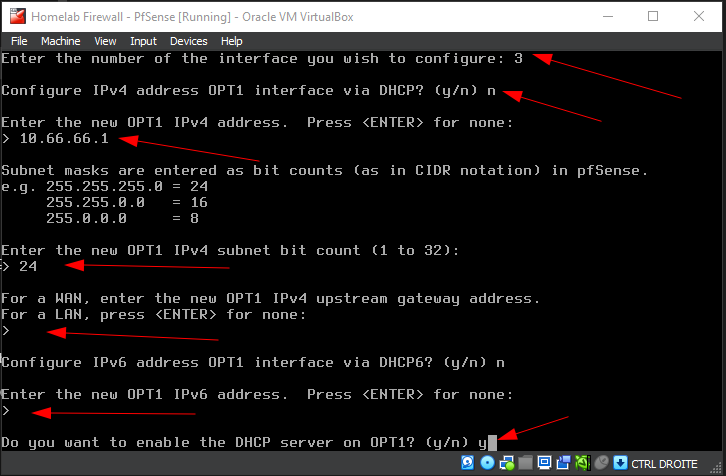
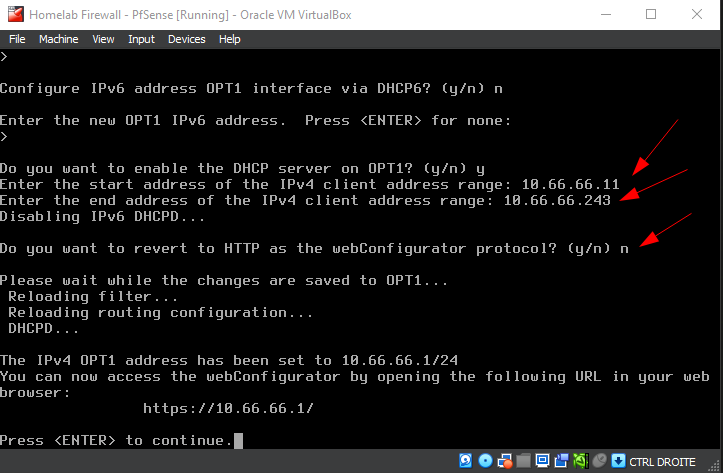
Configure the DMZ interface (OPT1)
Here, we configure the OPT1 (DMZ) interface by assigning static IPv4 address and enabling the DHCP server:
- Choose the interface number corresponding to the OPT1 (in this case,
3). - When prompted, decline DHCP for the LAN interface by typing
n. - Enter the desired static IP address (
10.66.66.1) and subnet mask bit count (24for a/24subnet). - Leave the upstream gateway blank by pressing
ENTER. - Disable IPv6 configuration by typing
n. - Enable the DHCP server on OPT1 by typing
y, then specify the DHCP range (start:10.66.66.11, end:10.66.66.100). - Answer
nto reverting to HTTP as the webConfiguraor protocol.
Follow the instructions on the screenshot and/or the description above
Follow the instructions on the screenshot and/or the description above
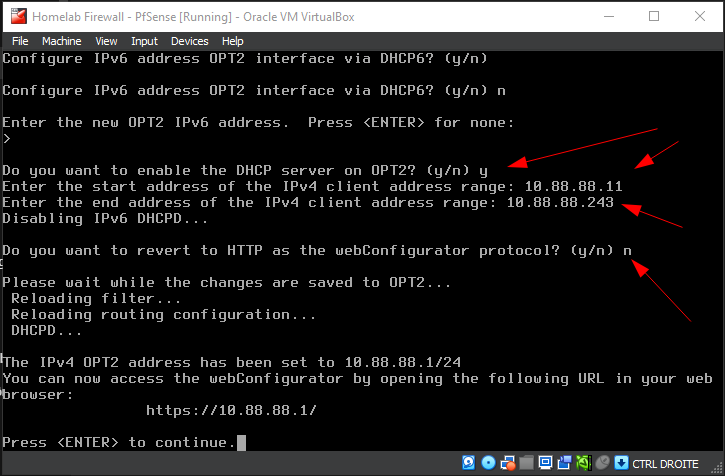
Configure the AD Lab interface (OPT2)
Here, we configure the OPT2 (AD) interface by assigning static IPv4 address and enabling the DHCP server:
- Choose the interface number corresponding to the OPT1 (in this case,
4). - When prompted, decline DHCP for the LAN interface by typing
n. - Enter the desired static IP address (
10.88.88.1) and subnet mask bit count (24for a/24subnet). - Leave the upstream gateway blank by pressing
ENTER. - Disable IPv6 configuration by typing
n. - Enable the DHCP server on OPT2 by typing
y, then specify the DHCP range (start:10.88.88.11, end:10.88.88.100). - Answer
nto reverting to HTTP as the webConfiguraor protocol.
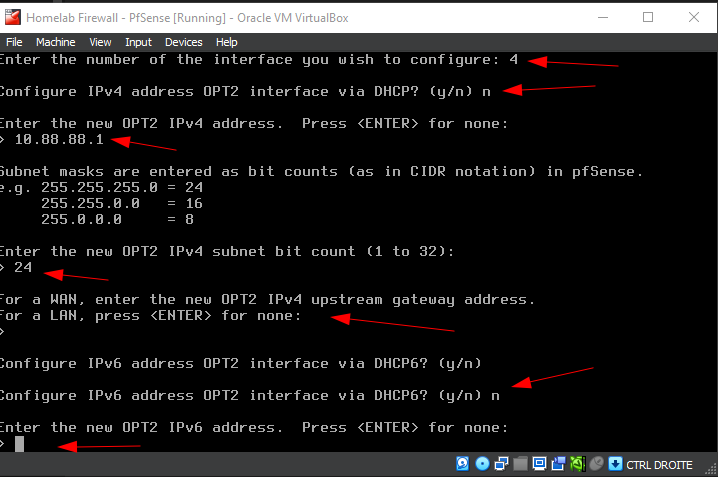
Follow the instructions on the screenshot and/or the description above
Follow the instructions on the screenshot and/or the description above
At the end, you should have something like this, other that the WAN's IP (ignore the IPv6 as it won't be used in this lab)
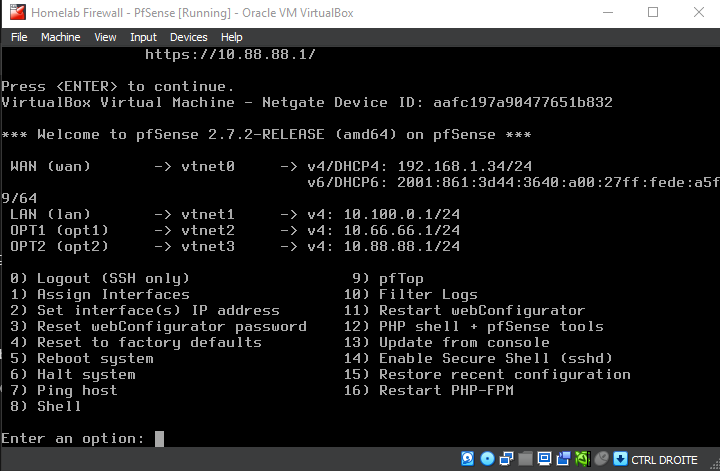
The summary of the interfaces and their IPs
Congratulations !
You now have pfSense installed on a VirtualBox VM.
Proceed to the next section if you want to deploy the full lab or add one of the environnements described here.